How do I create personalised links for each guest?
One link per group: the RSVP opens straight on the right group and, on some templates, the invitation shows the name and the seats reserved.
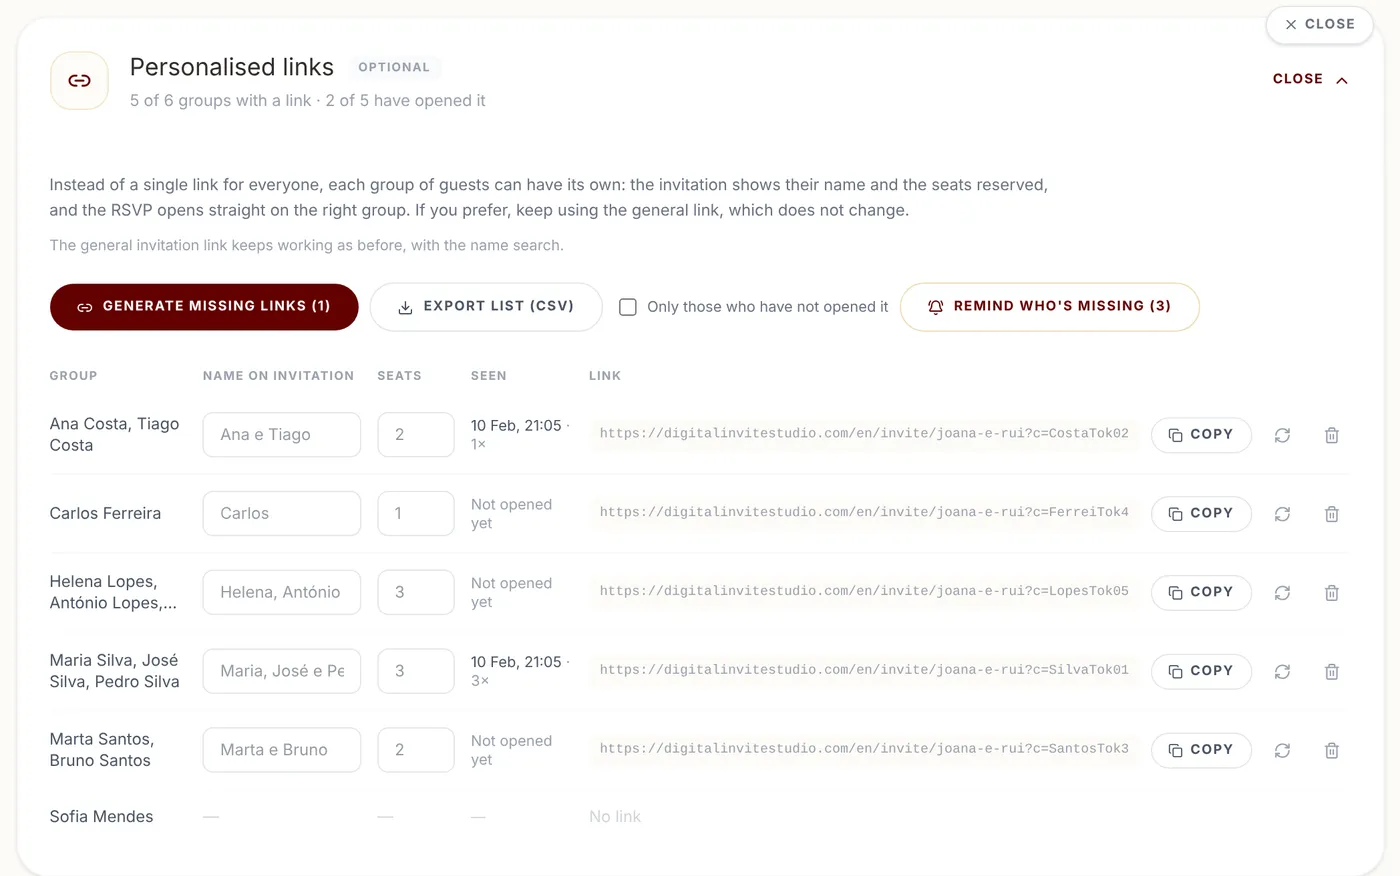
Step by step
- 1
Open Guests & tables and, under Tools, click Personal links: it opens the Personalised links panel.
- 2
Click Generate missing links. Each group gets its own link.
- 3
If you like, correct what appears on the entrance screen under Name on invitation and Seats. By default, the name comes from the group's first names and the seats count adults and children.
- 4
Copy each group's link or click Export list (CSV) to get names and links in a spreadsheet.
- 5
Send each group its link.
Tips
- It's optional. If you prefer, keep sending a single link to everyone, and guests look up their name in the RSVP.
- New link generates a different link (the old one stops working). Remove deletes the group's link.
- Remind who's missing (on the same card) lists groups with guests still to answer, those who never opened their link first, each with a ready message (name, personal link and deadline) to copy and send by WhatsApp, text or email. You can edit the message, and the dashboard marks who you've already reminded.
- On some templates, the entrance screen shows the group name and “We have reserved 2 seats for you”. On all templates, the RSVP opens straight on the right group.
Frequently asked questions
What if I change the group after sending the link?
The link keeps working and always shows the group's current details.
Do personal links ask for the access code?
Yes, if the code is on. Anyone opening a personal link also has to enter it.
Do new guests have no link?
Right, until you click Generate missing links again, which only creates the missing ones.