How is the dashboard organised?
A home page with one area for each part of the wedding.
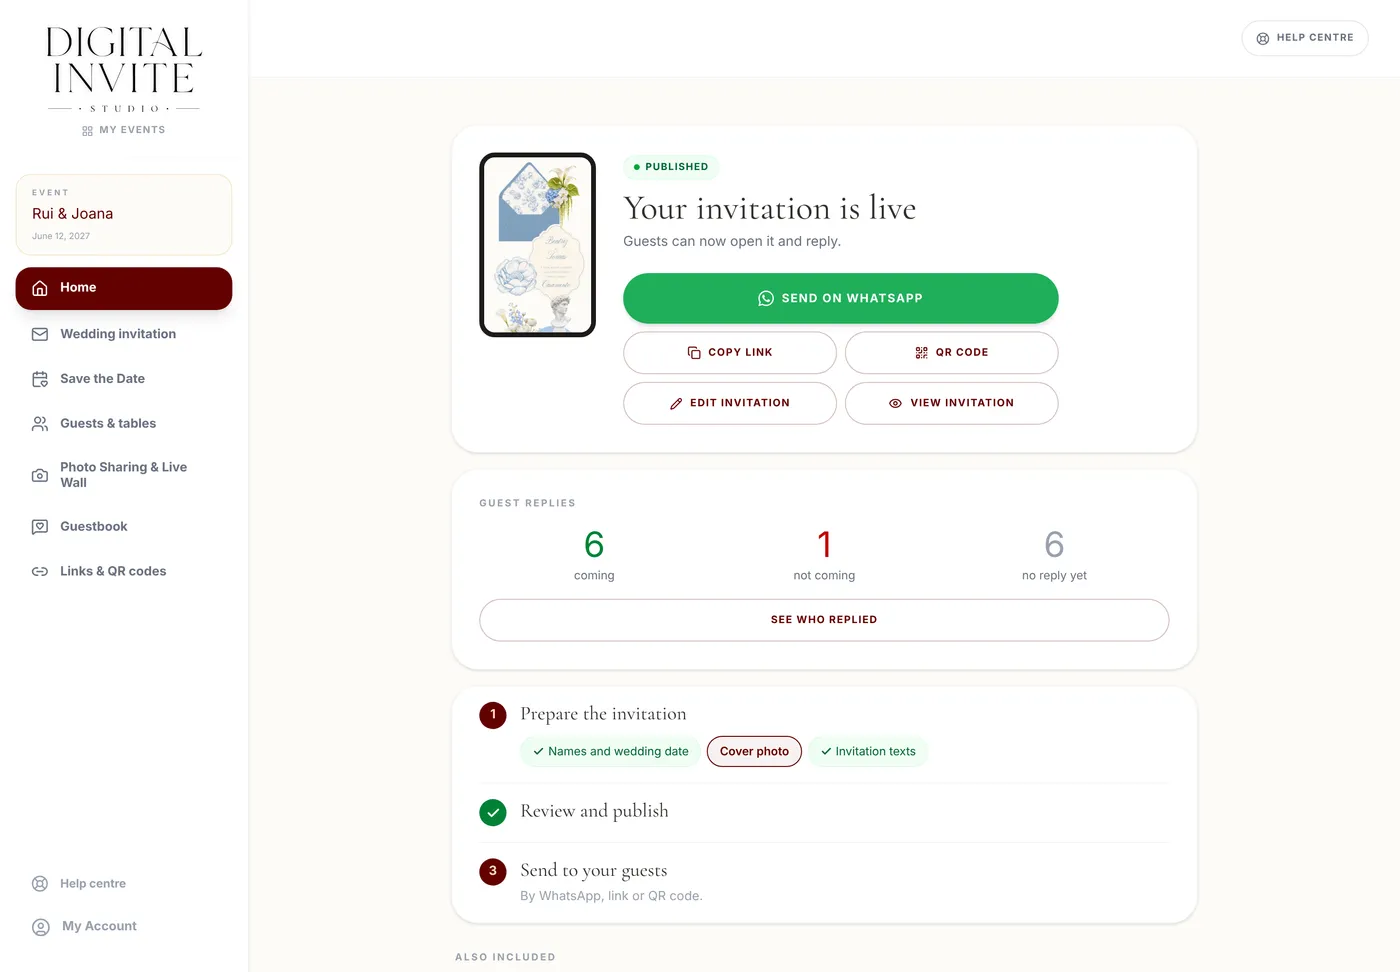
Step by step
- 1
When you open an event you land on Home. At the top is the Your invitation card, with a thumbnail of the design, its status (Not published yet or Published) and a single main button that changes with what is left: Continue: …, then Publish the invitation and, once published, Send on WhatsApp.
- 2
Below are the three steps, Prepare the invitation, Review and publish and Send to your guests, and further down, under Also included, the other areas: Save the Date, Guests & tables, Photo Sharing & Live Wall, Guestbook and Links & QR codes. Edit invitation and View invitation are always on the invitation card.
- 3
On a phone, the bottom menu is always the same: Home, Invitation, Guests and More (the other areas, My Account and the Help centre). On a computer, inside an area, the menu is on the left and Home goes back to the home page.
- 4
In the Invitation, the phone on the right shows the invitation as guests will see it and refreshes by itself after saving.
- 5
My Account, at the bottom of the menu, has four blocks: Your plan, Payments, Event team and Your details.
Tips
- You can prepare everything before paying. For guests to open the invitation, click Publish invitation.
- The first time you open a new event you see the Setup guide, with one question per screen (design, cover photo, where and when, a few words from you). You can tap Do it later and reopen it with the Setup guide button at the top of Home.
- Changes save on their own. The status shows at the top: Saving... and then Saved.